Features of the procedure for ovoscopy of chicken eggs by day
The procedure for ovoscopy of chicken eggs is used when hatching chickens. The technology of translucent eggs in order to find out if there is an embryo inside, appeared long ago. At first, ordinary candles were used for this purpose. Currently, there is a special device - the ovoscope.
Features of the procedure
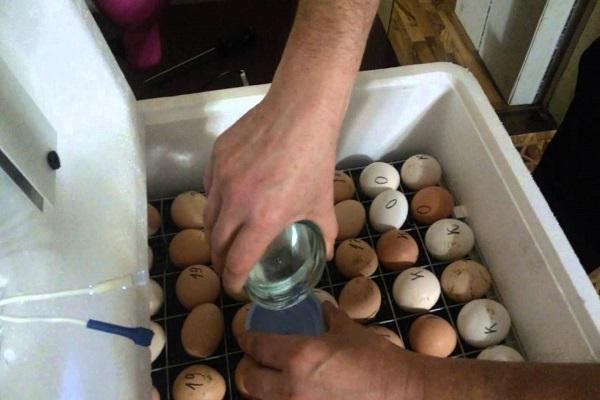
Ovoscopy is a simple but very informative way to identify the embryo inside. For the procedure, a device is used - an ovoscope, which shines through the shell, and it becomes clear what is inside.
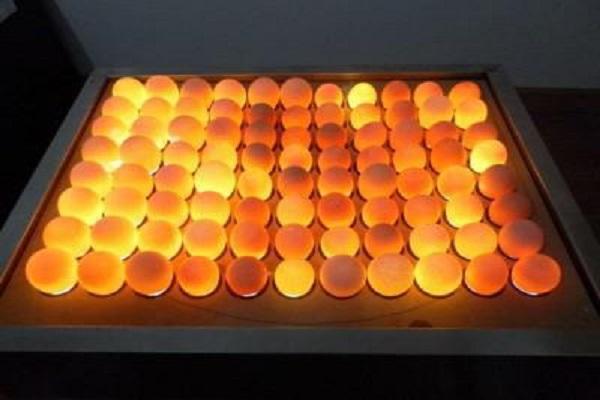
Ovoscopy can be performed at any time. An ovoscope is a small device with a light source inside. The upper part is a plate with a small hole for laying eggs. You can also purchase a portable ovoscope that looks like a flashlight.
What is it for?
You can breed chickens without an ovoscope. But thanks to ovoscopy, you can control the process at all stages of incubation and immediately throw out eggs in which the embryo was not found.
A normal egg, without various defects, looks like this:
- The shell is completely homogeneous, without damage.
- At the rounded end there is a small air chamber separated from the shell by a transparent film.
- The yolk is located in the center (it should be one, sometimes there are two yolks inside).
- If you start to rotate it, the yolk turns slowly.
- There are no black spots or blood spots inside.
Only healthy eggs are suitable for hatching chicks.
How is the process going?
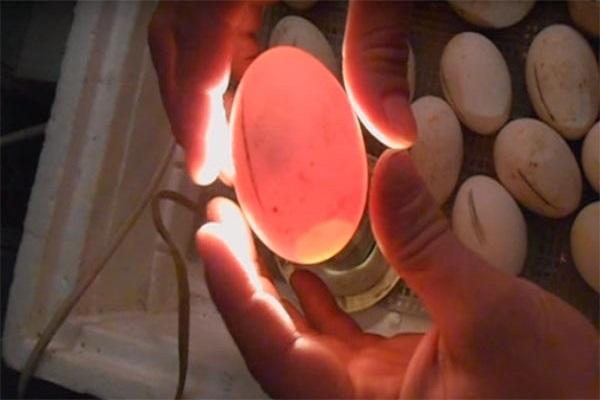
Ovoscopy is very simple. Before placing the eggs in the incubator, they are viewed with an ovoscope. They are placed on the device, turn it on. They shine through the shell, and it becomes clear what is inside.
Tool selection
Now there are a large number of ovoscopes, and it is often difficult to choose a quality instrument. First of all, when choosing an ovoscope, you should pay attention to the voltage of the device. Apparatus for which the voltage is 220 volts are suitable for purchase. Such an ovoscope will shine through the shell well, and all defects will be noticeable immediately. It is not recommended to take the ovoscope with less voltage. Not all defects may be visible during ovoscopy.
Another factor is power. It is worth buying devices for which it is equal to 25 watts. Up to 15 eggs can be illuminated with this device.
Moreover, the whole procedure will take no more than 15-20 minutes.
The only disadvantage of the ovoscope is its price.A high-quality device will be expensive, so if the chickens are taken out for a small subsidiary farm, buying an ovoscope is too expensive. Moreover, it can be made independently from improvised means. Or use a regular flashlight.
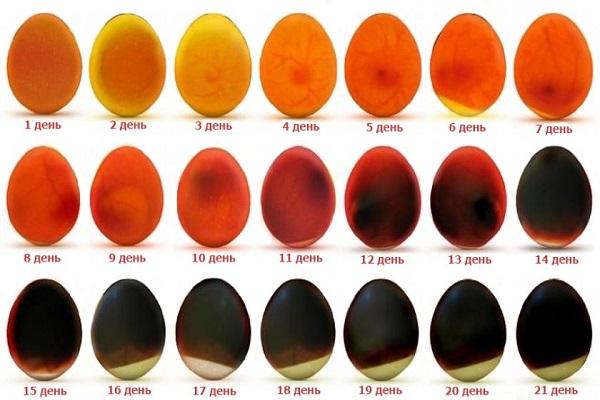
Ovoscopy of chicken eggs by day
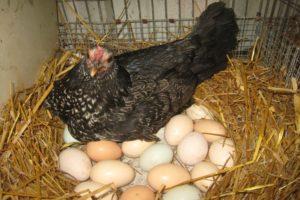
It is not recommended to get carried away with frequent ovoscopy. Especially if the chickens are brought out by the hen. If the bird is constantly disturbed, it will be very stressful for it, and it can completely leave the nest. In addition, there is a risk of damaging the shell and unhatched chicken.
If the eggs have just been laid, there is no point in shining through them immediately. But you can carry out ovoscopy on the first day. It often happens that there are two yolks inside, a chick is unlikely to hatch from such an egg, so it can be removed immediately.
For the first time
For the first time after laying the eggs, nothing will be visible on the ovoscope. During this period, the organs of the embryo are only laid. The egg is dark yellow on transillumination. There should be no dark spots inside.
3rd day
Having carried out the procedure during this period, you can see that the space inside has become lighter. If you attach the phonendoscope to the surface of the egg, you can hear the heart beating in the embryo.
4th day
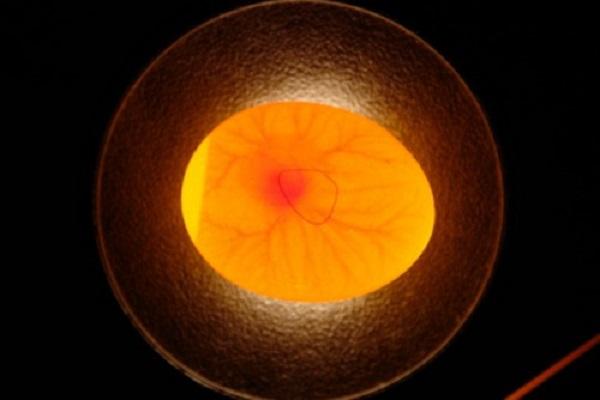
A blood network appears inside the egg, which is clearly visible, and a dark clot in the middle. At this time, the beak, reproductive organs and wings are formed.
5th day
Already you can see the umbilical cord, which comes from a dark blood clot in the center of the egg, you can also see the anatomical sac - the membrane that protects the embryo. If you look closely, you can see a small dark dot in the center of the clot - this is a chicken's eye. The blood vessels become thicker and darker.
6th day
The vascular mesh is getting larger and darker. The clot is blurred, its edges are no longer so clearly defined. The black point (eye) becomes even better visible.
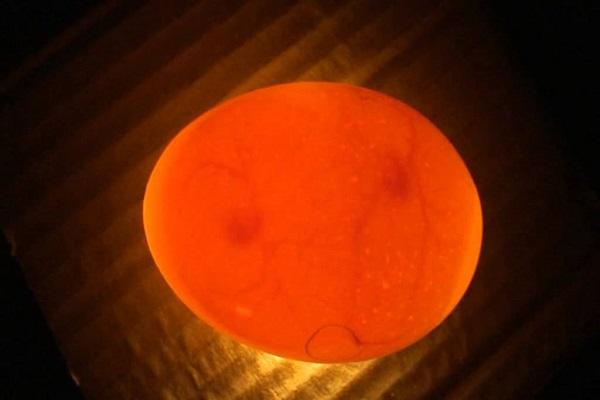
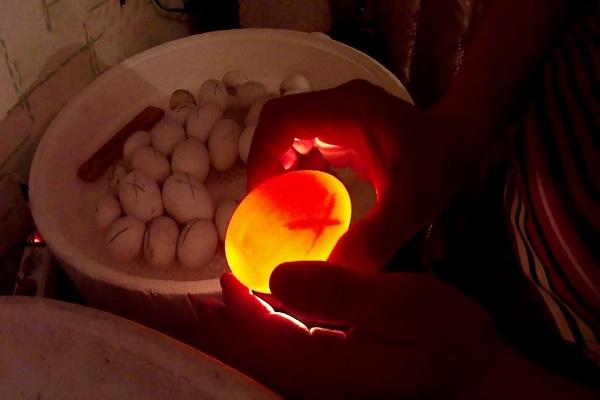
7th day
On the 7-8th day, the space inside becomes darker, acquires an orange-bloody hue. The blood vessels are clearly visible. Internal organs continue to develop in the chick.
If you open the shell during this period, you can see that the first feathers begin to form in the chick.
11th day
At this stage, the state of allantois is usually assessed. If the chick develops normally, the allantois fills everything inside the shell and closes at the pointed end. If you look closely, you can see the outline of a chick. The chick gradually grows in size, the space becomes darker.
15th day
The egg looks almost black, the chick fills the entire space. Almost all his organs were formed. At the same time, it is noticeable that it is on one side, and the opposite part from the chick seems very light.
19th day
At the end of the incubation period, no changes are visible. The chick has filled all the space, and the egg appears black when translucent. Clearance during this period should no longer be noticeable. If you look a little longer, you will notice how the chick moves. Usually on the 19-20th day, the chicken already pecks a hole in the shell.
What defects can appear during incubation
Scanning the shell before setting it in the incubator and during the entire incubation period will immediately discard eggs that are not suitable for hatching.
What defects can you notice:
- Weak vascular network.
- The appearance of a blood ring.
- The presence of blood points.
- Light lines.
- Foreign bodies inside.
- The appearance of dark spots - mildew.
- The air space is moved from the edge of the shell to the center, to the side or to the pointed end.
- The yolk flows from side to side.
- The yolk froze in place during the turns.
- Blood streaks.
When shining through, a red circle may be visible inside. This suggests that the embryo has died. Red dots appear due to the same thing.If during the procedure the chick takes up all the space and moves, it means that it will hatch soon.
It can be difficult to identify defects inside at first. Experienced poultry farmers who have been doing this for more than one year can immediately determine from which egg the chick will hatch, and from which not.
DIY ovoscope
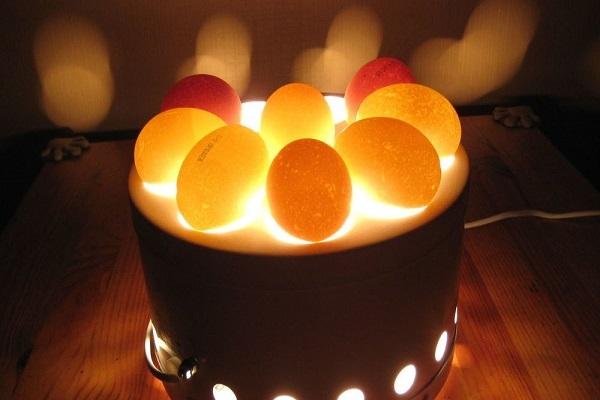
An ovoscope can be made from improvised means by yourself. This requires a light bulb and a cardboard box. A light bulb is fixed at the bottom of the box. From above the box is covered with a lid with holes, into which eggs will then be inserted. By aiming a light bulb at an egg, you can enlighten it and see what is inside. If you do not want to do an ovoscope, you can shine through with a flashlight.
Another way to make an ovoscope is to use a tin can. You need to take a light bulb, insert it into the socket. Cut a hole in the jar so that the egg does not fall through. Put the testicle in the hole, turn on the light bulb and examine.


Good article. He poked his finger at dad, otherwise he took it out) Only the hen will lay an egg - he immediately runs to me) to see if there is an embryo inside😂 Before this article, he considered a blood clot inside the embryo, which sometimes forms if the chicken was restless, scared during carrying.